
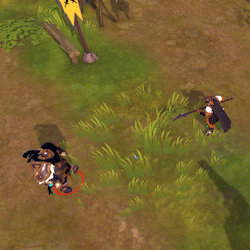
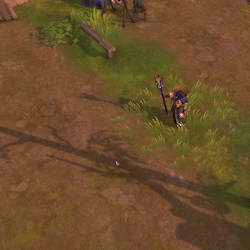
Carrioncaller MDPS
Carrioncaller Build
The Carrioncaller is a little different from most axes, whilst others are focused more on high damage over short periods, the Carrioncaller is what we call a “Bleed out” weapon. Its focus is on consistent damage and anti-heal. Your focus should be on keeping your stacks of damage over time up on your opponents where possible, and using your E spell to reduce healing received, and really lock in the damage you and your team has dealt
This is a Melee DPS (MDPS) build, and typically works best with a heavy Damage over Time (DoT) party composition. Your focus is on overwhelming the opposing team with a consistent barrage of damage instead of bursting the enemy together. When your team lands good damage, use your E spell to secure it, hindering the healer’s ability to restore their party’s health.
Rending Rage: A three part combo consisting of two slashes in front of you that stack the enemy up with “rending bleed” and a third jump attack that roots opponents in place and provides a third stack of bleed. The best way to use this spell is to simply use the first two slashes of the ability, then auto attack whilst you wait for cooldown before slashing twice again, and repeating. Only use the third stack when you need it for the root it provides for the best dps exchange, or to get that third stack on opponents quickly to hinder healing.
Internal Bleeding: This spell is your friend on this build, as we said, this build’s focus is damage over time. Internal bleeding will apply a bleed effect that damages opponents whenever they move, so works perfect to pressure frontline dps and tanks that have to move a lot, or their backline should they try to flee a fight. Deadly chop can be a good alternative if working with a more bursty single target dps to allow their damage to penetrate enemy resistances and do more damage.
Morgana Raven: A ranged skill that sends out a bloody raven to strike through all enemies on its path. This spell deals instant damage on hit, applies and damage over time bleed, and also reduces healing received by 30% for 5s. Anti healing in Albion is very strong, especially in 5v5 where the whole battle is essentially a battle of damage vs healing. Some weapons focus on the damage part of this equation, the Carrioncaller instead focus on reducing the healing part, something that has value not just for you, but all the damage your team is landing.


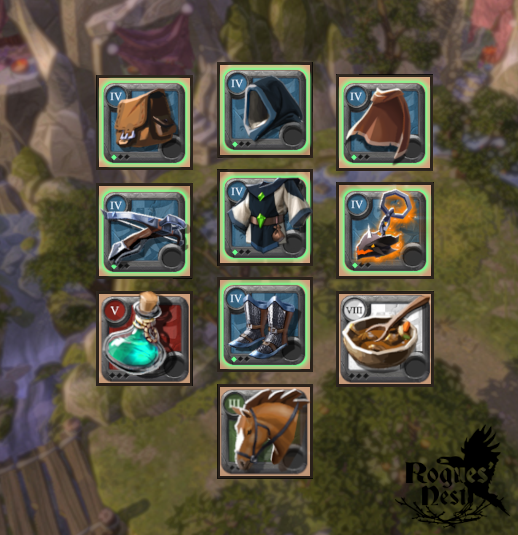
Equipment abilities
Fiend Cowl
This cloth cowl can be used defensively or aggressively. Offensive uses would be counted as using it to purge an opponent’s defensive skill, such as a cleric robe or hellion jacket to go for a kill, where as a defensive use would be counted as using it to purge an enemy Bow’s damage buffs, stalker jacket lightning, or sword player’s stacks. An alternative helmet that may help out is a stalker hood, granting a severe resistance reduction to opponents under 50% hp, giving you and your team better kill potential.
Royal Armor
With your main focus being keeping your opponents stacked up with bleeding, and being a constant force of pressure, wearing plate armor ensures you can hold your position as the only frontliner. The axes are however very energy hungry, and the Royal Armor is the perfect fix, restoring energy to your and your team for each enemy/ally in the radius of effect.
Royal Shoes
As a frontliner you will be a target for much of the opposing team’s damage. The evasive jump on these shoes can allow you to dodge burst damage, or dash back to your healer should you get pulled out of position. Mostly these are a defensive, there are very few cases where you use them to jump in on an enemy, but many situations where using them to jump back will save your life.
Martlock Cape
Relatively simple choice. Martock Cape gives you a huge defensive boost at low HP to help the healer recover you before death, Thetford cape gives more constant damage pressure. Wear whichever one you feel comfortable with, or that you feel you need in the fight.
none
Passives
You want to focus on your damage and defensives on this build. “Aggression” on cloth pieces, “Balanced Mind on leather pieces, and “Toughness” on plate pieces is the way to go. As for the Axe, take “Increased Defense” granting you more resistances on auto attacks to help keep you healthy during the fight.
Beef Stew
You are in plate armor, so adding to your damage through food is the best way to go. Don’t forget that you can use T8 food at any point in the game, even if you are new, and T8 stews whilst relatively cheap compared to other foods, will grant you a massive improvement to your damage.
Resistance Potion
The resistance potion is an important defensive as a frontliner to ensure you can cover yourself from focus, and buy your healer the time to pick you up. Remember, that there can be cases to use this aggressively, to allow you to push up to the enemy and pressure them, with the increased defense protecting you whilst you do it, possibly buying your team the time they need to recover before returning for heals.
Strengths
- Consistent damage over time
- Durable, and can take damage
- Great anti-heal to lock in damage
Counters
- High resistance pierces
- “Kidnap” compositions